A very useful tool and really easy to build; we will use a common 10mm white LED to create a flashlight that may remain ON for several days with a single charge.
The flashlight design will be based on the standard tool handle created in the Projects section (“Lithium-ion Batteries Safety and Tool Design”).
Specifications
The LED flashlight will be able to:
- Illuminate with the intensity of a common white LED; we aim for duration instead of brightness.
- Stay ON for several days on a single charge.
- Be recharged using a USB connection.
Our standard tool handle can store a good amount of energy (depending on the battery, it could go as high as 3,500 mAh), and can be recharged via a micro USB port. Taking into consideration that a common LED can handle a maximum current of 20 mA, the flashlight may work for a week continuously on a single charge.
Building the unit
The whole process is as simple as connecting the standard tool handle to the LED via a current limiting resistor, and the LED Flashlight is ready! (Figure 1).

FIGURE 1.– USB rechargeable LED flashlight electric diagram
Just make sure to connect the positive wire from the handle to the long lead of the LED via the resistor and the negative to the short lead. White LEDs forward voltage is around 3.2 V; therefore, with the battery fully charged at 4.2 V, the current can be calculated as I = (4.2 – 3.2) V / 51 Ω, which is equal to 19.6 mA, safe for the LED. As the battery discharges, the current will slightly decrease, but there will be no mayor decrease in the light intensity. During actual tests, it kept working even below 3.0 V.
The only missing part now is to have an appropriate 3D printed enclosure that connects with the handle on one end, and shows the LED on the other (Figure 2).
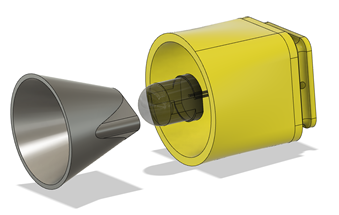
FIGURE 2.– 3D printed parts and LED mount
The LED fits securely between the main housing and the reflector; 2 screws will keep the parts in place. The body gets firmly connected to the tool handle by the groove in the back end (Figure 3).
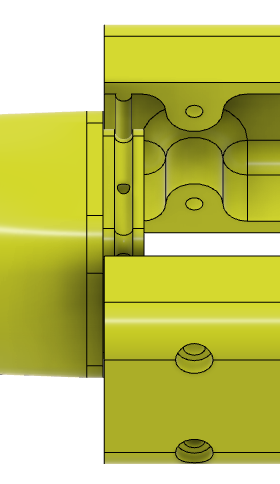
FIGURE 3.– Grooves in the tool head match protuberances in the handle to create a secure union
Required parts
Only a few parts are required to create this tool head; all of them are widely available as of July 2020; the links are just for reference, you may find them somewhere else.
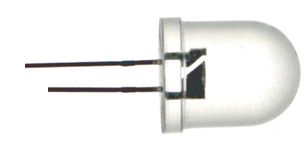
- 10mm white LED.
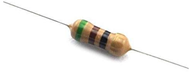
- Resistor, 51 Ω, 1/8 watt.
- Screws:
- Philips Pan Head #2-56 x 1/2 (quantity: 2).
- 3D printed parts (STL files included in the Download section):
- Head main body.
- Reflector.
- Miscellaneous:
- Wires (stranded, 22-24 AWG).
- Soldering iron and solder.
Printing the parts
The main head body may be printed vertical on its back end using supports, with a layer height of 0.2 mm. The reflector should be printed without supports on its back end as well, using a higher resolution, 0.1 mm layer height or better. A reflective plastic should be used, like silk silver PLA.
Mounting the parts
The LED fits tightly into the reflector back end and it is secured in place by the main head body. The 2 screws join the body and the reflector. Before mounting the LED in place it is convenient to solder the resistor and the wires, as close as possible to the LED body.
Actual tool pictures
This is how the LED Flashlight looks like (Figures 4 and 5). The front shows the LED surrounded by the reflector and the head body. The rest of the body is the same reviewed in the previously referred article (“Lithium-ion Batteries Safety and Tool Design”).
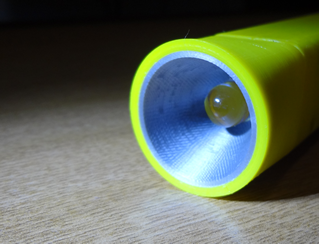
FIGURE 4.– Front face of the LED Flashlight

FIGURE 5.– Full tool