The ESP8266 adds Wi-Fi connectivity to any device and can be configured either as an Access Point, a Station or both, providing great flexibility when designing a connected setup. Connections can be established between units and with the user, either limited to the local network or accessible from outside, which creates an endless range of possibilities.
In a previous document we reviewed the method to connect, program and test the ESP8266-01 module, either linked to a PC or in a standalone operation. However, the Wi-Fi connectivity, the real value of this device, was not discussed at all; in this document we will review how to use the ESP Wi-Fi capabilities.
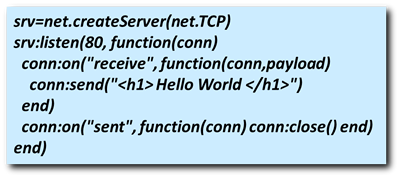
Basic web server
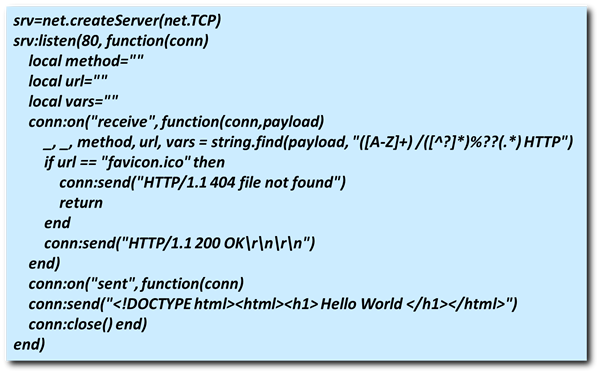
Creating a basic web server in Lua, within the NodeMCU environment, is quite simple. It only requires a few lines, as shown below:
 (
(Using the ESPlorer (see previous document), save this script as init.lua in the ESP8266 (make sure that there is no other instance running by deleting all previous scripts on the module and restarting, typing node.restart() in the command window of the ESPlorer and clicking the “Send” button, see Figure 1).
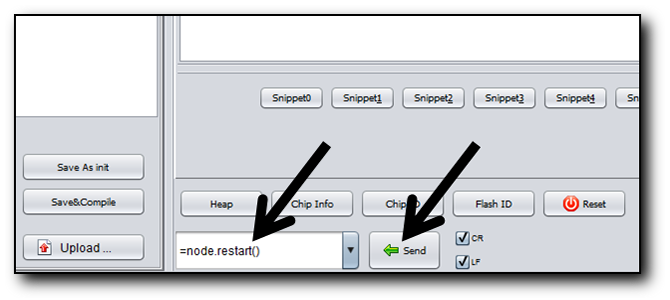
FIGURE 1.- ESPlorer command window
Close the connection in ESPlorer and disconnect the adapter cable from the PC. Connect the adapter board to an external 5 V power supply, as shown in Figure 2.
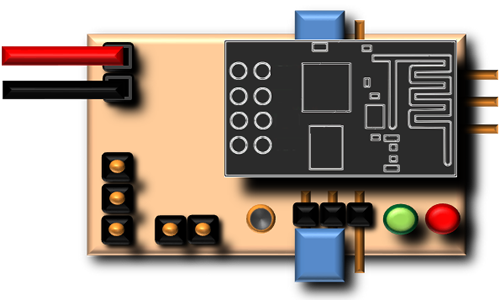
FIGURE 2.- Adapter board connected to an external power supply
If you have no power supply available, you may as well use the adapter cable and connect to the USB port of the PC. However, please note that we will not be using the USB connection this time.
Open the Network Administrator in your PC and enable wireless connections; you may notice that there is a new wireless access point, called ESP_81Axxx (your actual name may be slightly different). Connect to this network.
As you may have guessed, you are now connected to your ESP8266!
Now, let’s see if it responds with the message “Hello World” when called, as it was instructed by the command conn:send("<h1> Hello World </h1>"). In your web browser type this address:
192.168.4.1
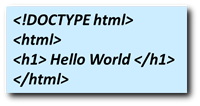
The browser should return the contents of Figure 3.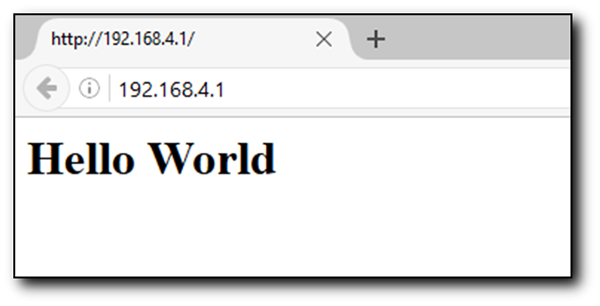
FIGURE 3.- ESP web server response
Congratulations! You have configured your first web server using the ESP8266.
You may wonder why the server address is the one I mentioned (192.168.4.1), since there was no indication of such in the web server script? This address is fixed by the ESP firmware; there are methods to change it, however I will not discuss them since they are out of the scope of this review, and we will not be using this configuration much in the future.
Let’s try something else; connect your mobile device (phone, tablet) to this network, and type the address in the web browser. Most probably you will receive a message like:
“Safari cannot open the page because the network connection was lost” or simply
“The network connection was lost”
No matter how many times you try, you will not see the reply from the ESP. This is something expected, since the basic web server we created does not follow the proper structure of a standard server; some browsers may accept this and display the message, while others will not.
Proper web server
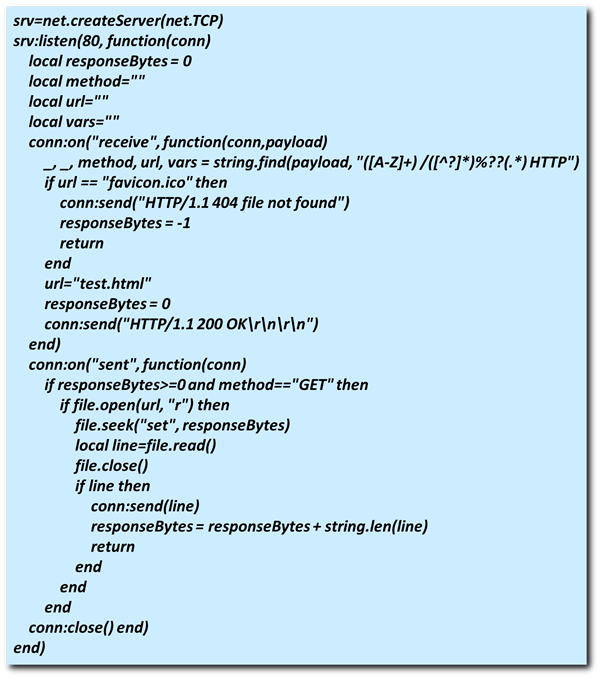
Now it is time to create a web server with all the elements required to be recognized by all the standard browsers, including those available in mobile devices. Delete the previous script, restart the module and upload the following code to the ESP; remember to name it init.lua if you want a standalone operation:
 (
(Once the code is uploaded and running, you may connect to the ESP access point. Now type the address in the browser of your mobile device, 192.168.4.1.
You should now receive the message Hello World, formatted in bold type. The additions in the code are actually the minimum requirements for a proper dialog when a web page is requested by the browser. In fact the code sends a “complete” web page in this line:
conn:send("<!DOCTYPE html><html><h1> Hello World </h1></html>")
You may test this code by opening a new document with Notepad; type:
 (
(Save it as test.html. Open it with any browser and you will see the words Hello World in bold.
Back to the ESP, while this script works, it is not quite useful when you have to send more elaborate pages, e.g. with buttons and commands. Not only it is cumbersome to write the html code inside the function, it will definitely fail when trying to send long pages, and the ESP may reset itself. The solution is to write a proper html page outside the script, and call it when required.
Independent html page
How to write html code is beyond the scope of this document; however I will show some examples of working web pages that we will call from the ESP server script. Let’s put the Hello World page outside the script and call it.
First create the page; let’s use the test.html file created above. Upload it to the ESP (as always, remove all previous files and restart first). Once uploaded, the ESPlorer will show an error:
test.html:1: unexpected symbol near '<'
stack traceback:
[C]: in function 'dofile'
stdin:1: in main chunk
>
This is normal, since the ESP is trying to run something that is not written in Lua. Now, upload the following Lua script to the ESP, saved as init.lua (without removing the html):
 (
(Restart the module and connect to the access point; type 192.168.4.1 in the browser. You should receive Hello World as response.
As you can see, the text Hello World is nowhere in the Lua script; it is written in the html file. The script loads the html page name in a variable (url="test.html") and later calls it within the conn function. The function reads the page line by line and sends it to the browser.
Controlling the ESP hardware from a web browser
Now that we can use an independent html page to be displayed when the ESP is accessed, the range of possibilities increases exponentially. Not only can we show messages but we can send commands back to the ESP, controlling the hardware, using a graphical interface.
The hardware in the ESP8266-01 is quite simple; we have just 2 ports accessible, GPIO 0 and GPIO 2. We reviewed how to control the ports in a previous document, and using the adapter board we have the additional advantage that each port can be connected to an LED. The objective now will be to control the LEDs from the browser, with a couple of buttons per LED, basically the ON and OFF status.
Let’s start by creating the html page, which will be named leds.html:
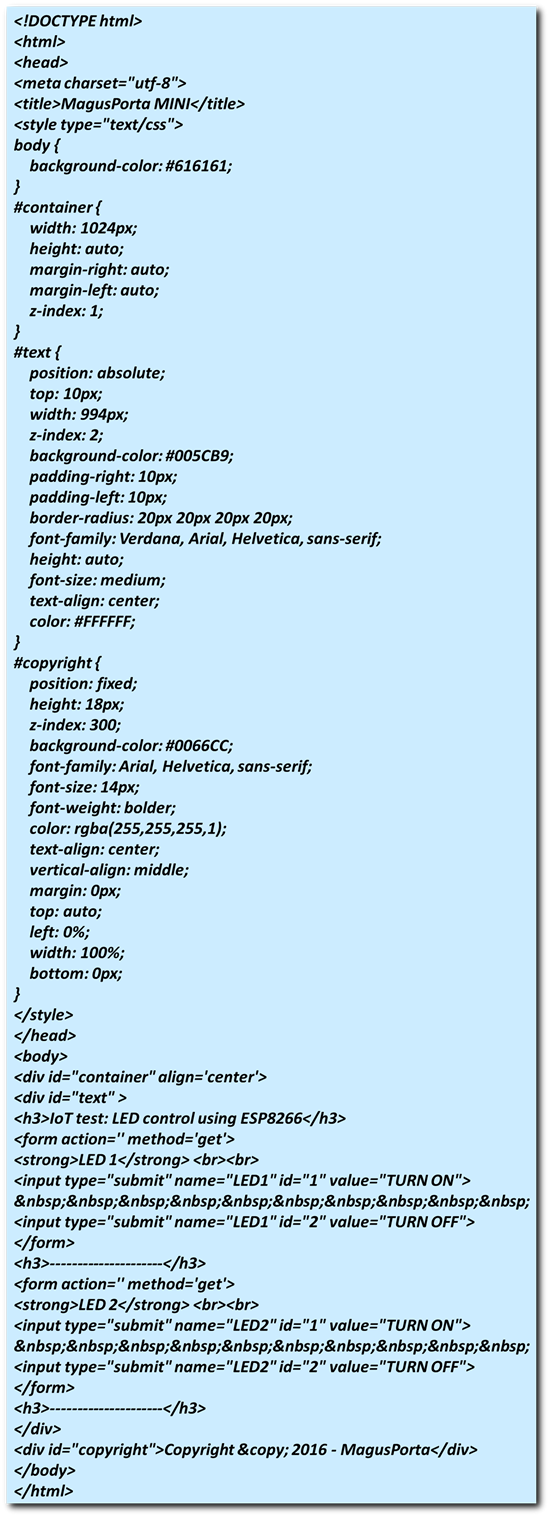 (
(This looks a bit more complex than the Hello World example, but mainly because I am creating a nice format and background for the page. The important part is at the bottom, where I define the buttons, actions, names and values. You may see that the names “LED1” and “LED2” appear here, as well as the values “TURN ON” and “TURN OFF”. This is essential, since we will be expecting these keywords in the Lua script to perform the proper actions with the hardware, i.e. controlling the LEDs.
Delete all files in the ESP and upload this html page (leds.html).
Now save this script as init.lua:
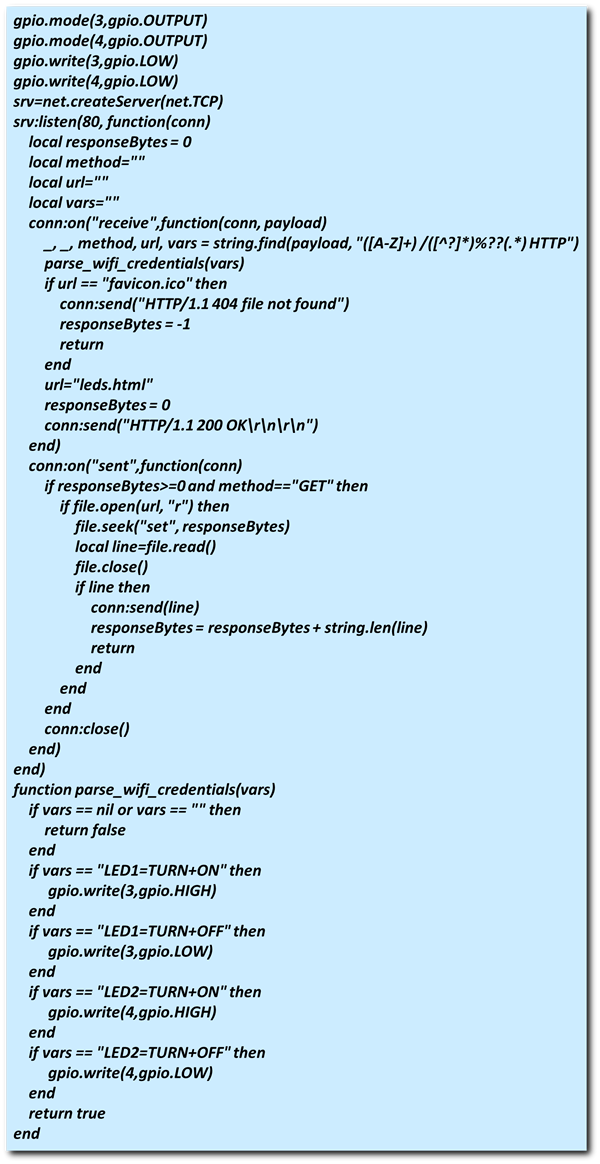 (
(This last portion of the script reads the keywords sent by the browser when each button is pressed, and controls the status of the ports accordingly.
Restart the ESP, connect the PC to the access point and type the address in the browser; Figure 4 shows the returned page.
FIGURE 4.- Web page to control the ESP8266-01 ports
Pressing each button will have an action on the ESP, turning on or off each one of the LEDs. Congratulations! You now have remote control of the ESP hardware, therefore anything connected to it.
ESP8266 as “station”
So far we have been working with the ESP8266 configured as an “access point”; while it is adequate for a point-to-point connection, it has some limitations if we want to establish more elaborate connections. Another way to configure the ESP Wi-Fi connection is as a “station”. In this way, the ESP will appear as another device in your home network, connected to the router.
The station configuration is quite simple; only 2 lines need to be added at the beginning of the Lua script:
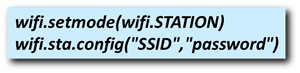 (
(Where it says SSID you just put the name of your home network; password is obviously your network password.
How do you access the ESP now? In DHCP mode, the most common configuration of a router, the ESP will have an IP address automatically assigned. You may look for it on the router page, or by adding a line in your Lua script:
print(wifi.sta.getip())
This line will show in ESPlorer the IP assigned by the router to the ESP. You may put it immediately after the 2 lines shown before.
A quick note here: the first time you run this script, configuring the station mode, the print line may return nil. The process runs very fast, so there is no time for the router to assign an IP before the print command is executed. Once the router assigned the IP, this is stored in non-volatile memory, so next time you run the script or reset the module the print command will show the assigned IP address:
> dofile("init.lua")
192.168.1.23 255.255.255.0 192.168.1.1
>
As you can see, in this case the IP is 192.168.1.23, and it is followed by the subnet mask and DNS server.
If you type this IP in your browser, you will see the same screen shown in Figure 4 before, and you can control the status of both LEDs.
Static IP
Sometimes it is quite useful to have a constant IP assigned to the ESP, so you always know where to call. This is easy to achieve with just a few lines:
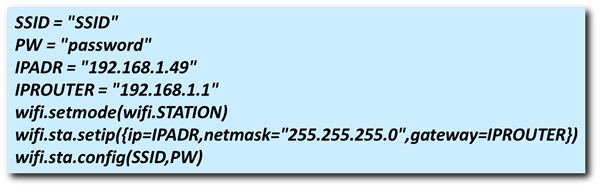 (
(For clarity, a few variables have been added, but only one new function is present, wifi.sta.setip(). This function request the router, located at 192.168.1.1, to assign the ESP the IP address 192.168.1.49. Always make sure that the requested address is within the range you have set in your router for valid IP addresses, and that it is not currently used by any other device in your network.
You may also set a static IP for the ESP in your router, knowing the MAC address of the module. It is up to you which method you use, although I prefer the former so I do not have to deal with the router setup.
This concludes the second document on the ESP8266; at this point you should be able to setup the ESP, configure a web server and control the hardware via web commands, from a graphical web page. The same way an LED is turned on and off, a relay may be connected to the GPIO output (with the proper protection and current amplifier setup, i.e. transistor and diode), so a much larger electrical load can be controlled. A typical application is to control a remote AC outlet, so you may turn on and off anything plugged to it. You now have the knowledge to do it, so do not be afraid to experiment; however, as usual, be extremely cautious when working with high voltages and/or currents.